Twitter 6000km
Geotagging the Ruhr, the method

Aprovecho que en un rato comenzamos el taller-ponencia para publicar las instrucciones de cómo hemos hecho para georeferenciar las fotografía del proyecto para el Ruhr y mostrarlas en un mapa. Pronto os contaremos más pero aquí va la explicación en inglés para que los asistentes al taller de esta tarde puedan entender cual ha sido el método. Aunque estemos en Alemania hemos escrito en inglés. Entschuldigung!
—
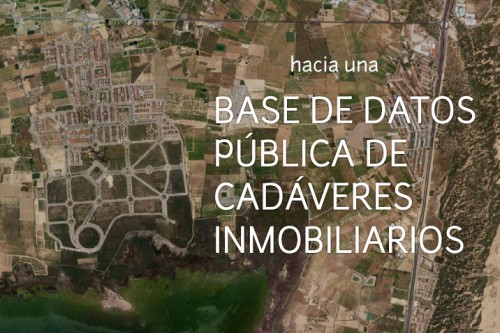
For the year 2010 the Ruhr Gebiet host the European Capital of Culture entitled Essen für das Ruhrgebiet and called Ruhr.2010. Among the activities celebrated by Netherlands one of them is the project Gastgastgeber. Basurama uses the Gastgastgeber’s infrastructure to make its own research project.
Basurama wants to document and investigate the buildings, materials and empty plots through geolocalized online information (photos, texts and videos). The Ruhr Gebiet, specially the Rhein-Herne-Kanal, is an ideal opportunity to discover and think about the industrial areas in the post-industrial era. The map is also a collaborative tool that alows anyone to add and update more information.
It could be visited in http://basurama.org/maps/ruhr and the project in http://basurama.org/b10_ruhr2010.htm
Here I write you step by step how we have dealt with the geotagging of the photos in this project. We have synchronized the time of the camera with the GPS, so every photo is attached to a moment, and every moment is geolocalized according to the time stamp that the GPS creates.
Hardware
- First of all you need a GPS or track logger. We have a Garmin etrex Legend HCx.
- A normal digital camera.
Software
- We are using Ubuntu Linux but any other system would also work out.
- JOSM, as it is a java program doesn’t need installation http://josm.openstreetmap.de/>
- Meipi installed on our server http://code.google.com/p/meipi
- The time of your digital camera and your GPS must be set the same day time.
- Walk and make photos with you GPS turned on.
- Download the photos and the track log from your GPS. It will have a .gpx format. You will be able to download it directly from the GPS if you have set it to save every track in the SIM car of your GPS. If it is not your case yo can download it using QLankarte (Mapsource if you are in Windows).
- Download the last stable version of JOSM http://josm.openstreetmap.de/You need a .jar file
- Start JOS with the command in the shell
«java -jar josm-tested.jar»
(use «java -jar -Xmx512M josm-tested.jar» to give more ram if you have not enough) - Then you would need to install a plugin. Go to edit -> preferences -> plugins -> photo geotagging and click OK.
- Close JOSM and reiniciate (step 5.)
- Open the track log (3.),is a .gpx file.
- On the upper right part of the screen you have the layers. Put the mouse over the layer’s name (the name of the track) and click the right button and select the option «import photos». You can select an entire folder or some files. Click OK.
- Click correlate with GPX.
- Check if you have properly synchronized the clocks of the GPS and the digital camera. To check this just press on the icons of the photos that appear on the track and see if they are in the right position. You can correct the no-synchronization manually.
- Once you are sure the photos match with the place click with the right button on the layer of the photos and select «write coordinates to file header». This will write the coordinates (longitude and latitude) to the EXIF data of each photo.
Now you have all your photos with geodata but, how to see them?
For the moment in the webwe have testedsome options:
- Flickr: upload the photo and click add to map. It will detect the geodata of the EXIF. I have not seem this option in a batch mode.
- Picasa: install Picasa on your computer and then you will see a symbol of a compasss on everyphoto that has geodata. If you upload it to a web album of picasaweb.google.com it will automaticaly appear in a map.
However you will have to fix something first. I suffer this bug: http://www.munz.li/?p=33, and with the following solution Picasa works. To fix it you need to installlibimage-exiftool-perl
Write in the shell
«sudo apt-get install libimage-exiftool-perl»
Then go to the folder where he photos are andwrite in the shell
«exiftool -GPSVersionID=0.0.2.2 -overwrite original imagepath/*.jpg»
(you can check if anyphoto has geodata with the comand exifname-of-image.jpg») - Meipi: But the one we prefered is Meipi Opens http://code.google.com/p/meipi/downloads/list.
We will be able to upload geolocalized texts, videos and photos in a controled web-enviroment and open to collaborators.To upload the photos to Meipi you have first to install it in your server (the online version in meipi.org does not support geodata in the EXIF for the moment).
We installed it in http://basurama.org/maps/ruhr/
It is necesary to make the same process as in Picasa with the exiftool for every photo (we don’t know why but some photos failed in the recognition of their latitudeif you don’t apply the exiftool).
In collaboration with the Meipi-team we have developed a plugin that detects the geodata of the photo that we are uploading to the entry and it directly geolocalizes the entry where the photo was taken. This feature is not yet available in the version 1.0 but in following versions it will be.
Ask for this if you are interested.We are using the Meipi for more concentrated information and a map web album in Picasaweb to upload all the photos. Then we will be able to embed the photos from Picasa in the entries of Meipi. See example: http://basurama.org/maps/ruhr/meipi.php?open_entry=46(In following updates I will explain how to use Open Street Maps instead of the googlemaps).
Final out put
You can visit it in http://basurama.org/maps/ruhr/
It could be embebed in any website with the code
<iframe src=»http://basurama.org/maps/ruhr/map.php?embedded=true» height=»590″ frameborder=»0″ width=»790″ scrolling=»no» marginheight=»0″ marginwidth=»0″></iframe>
As it appears in http://basurama.org/b10_ruhr2010.htm
–
We will be updating this post to complete the step by step and correct errors.